Bicycle Registration
Information on how to register your bicycle on Immobilise.
Whether you are registering a bike with just a frame number, an ImmobiTag, ImmobiBike or any other 3rd party marking product, you can follow the process below.
If you don't have all the information to hand, you can easily return later to complete the registration.
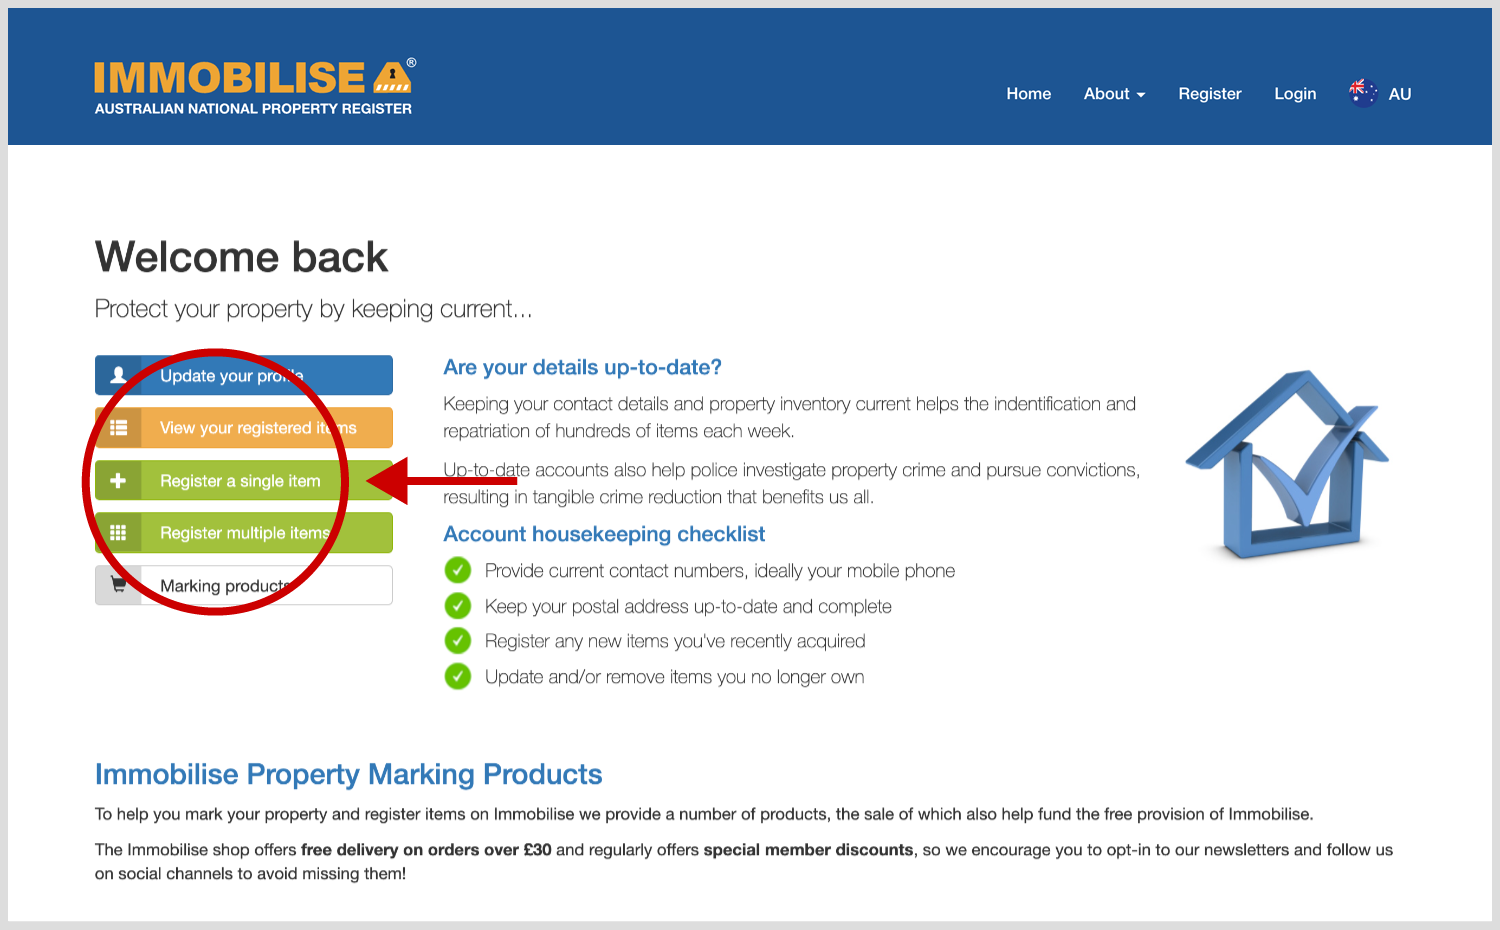
Once inside your Immobilise account add a new item by clicking the button Register a single item.
On Step 1 provide details of your bicycle by Type, Make, Model, Description, Markings, Date Purchased and Purchase Cost. Click next, the details will be saved and you will be taken to Step 2.

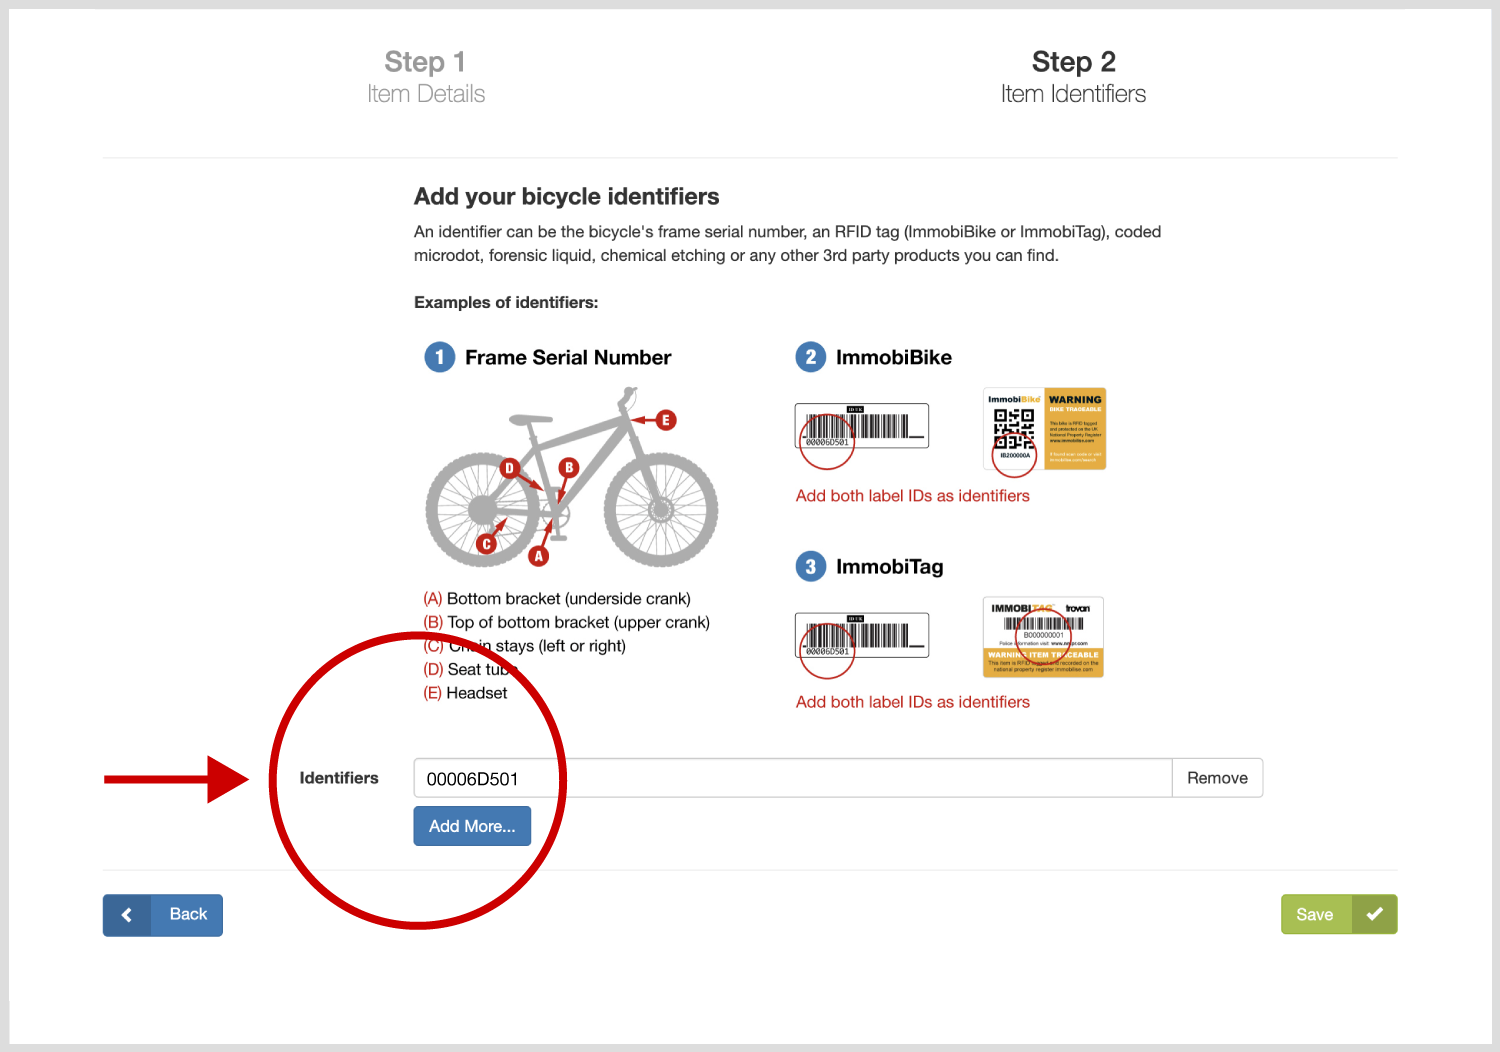
On Step 2 enter as many identification codes as you can find in the input box provided. These can include the bicycle's frame serial number, an RFID tag, coded microdot, forensic liquid, chemical etching or any other 3rd party product marks you can find.
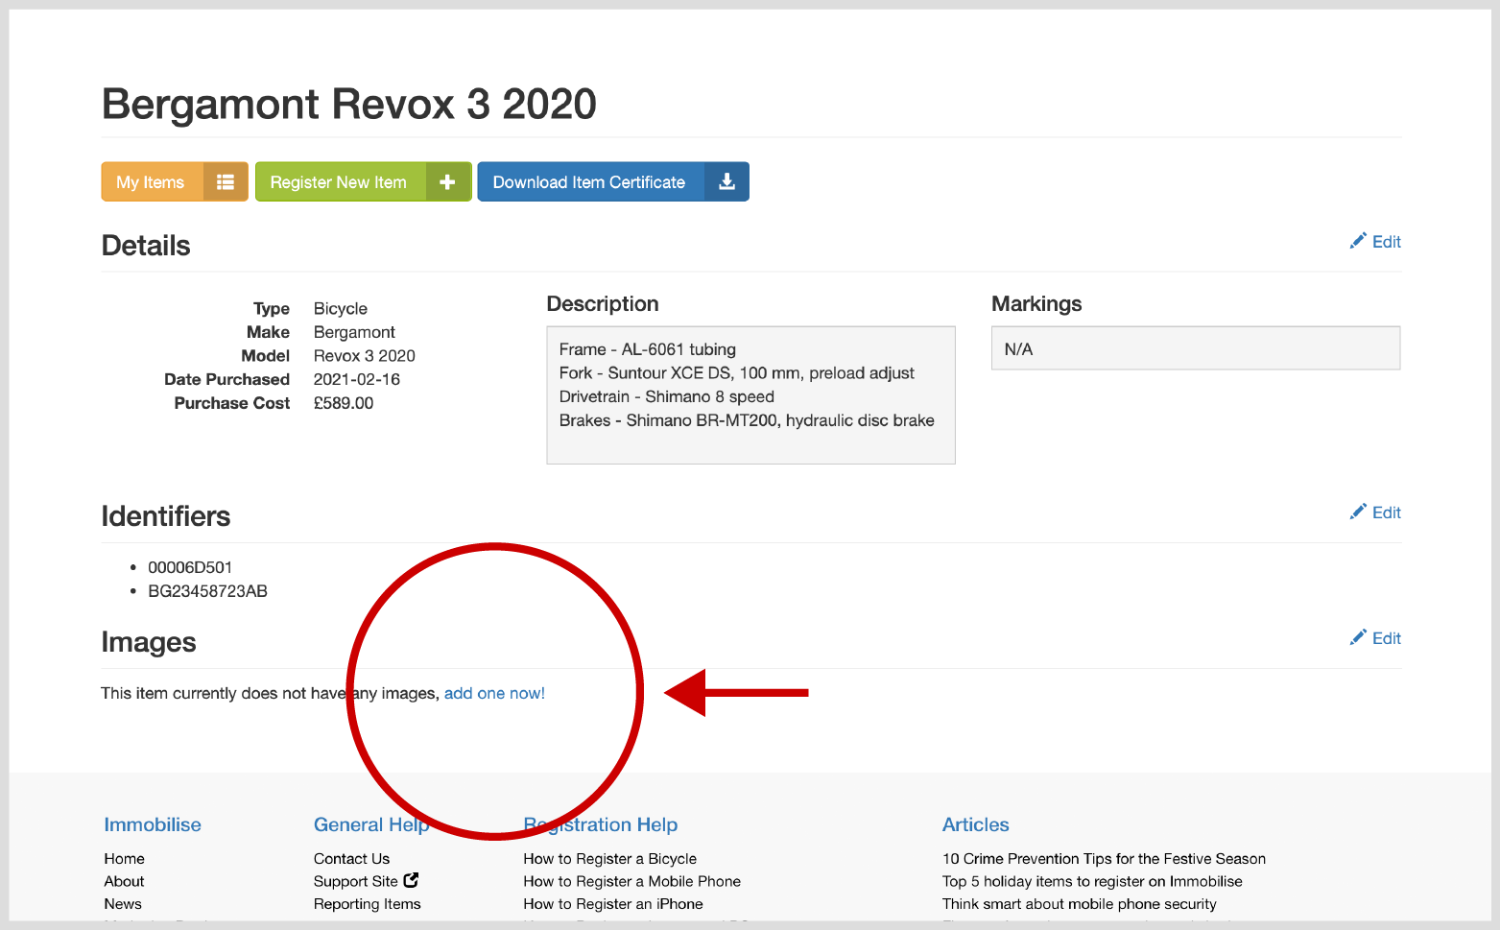
In the overview of your registered item you can add photographs, a purchase receipt or other documents such as an insurance certificate. Click add one now! and in the input box that appears, use the select button to find the file, then click the upload image button to add it.
Please note the system will only accept JPEG or PNG file types under 2mb in size.
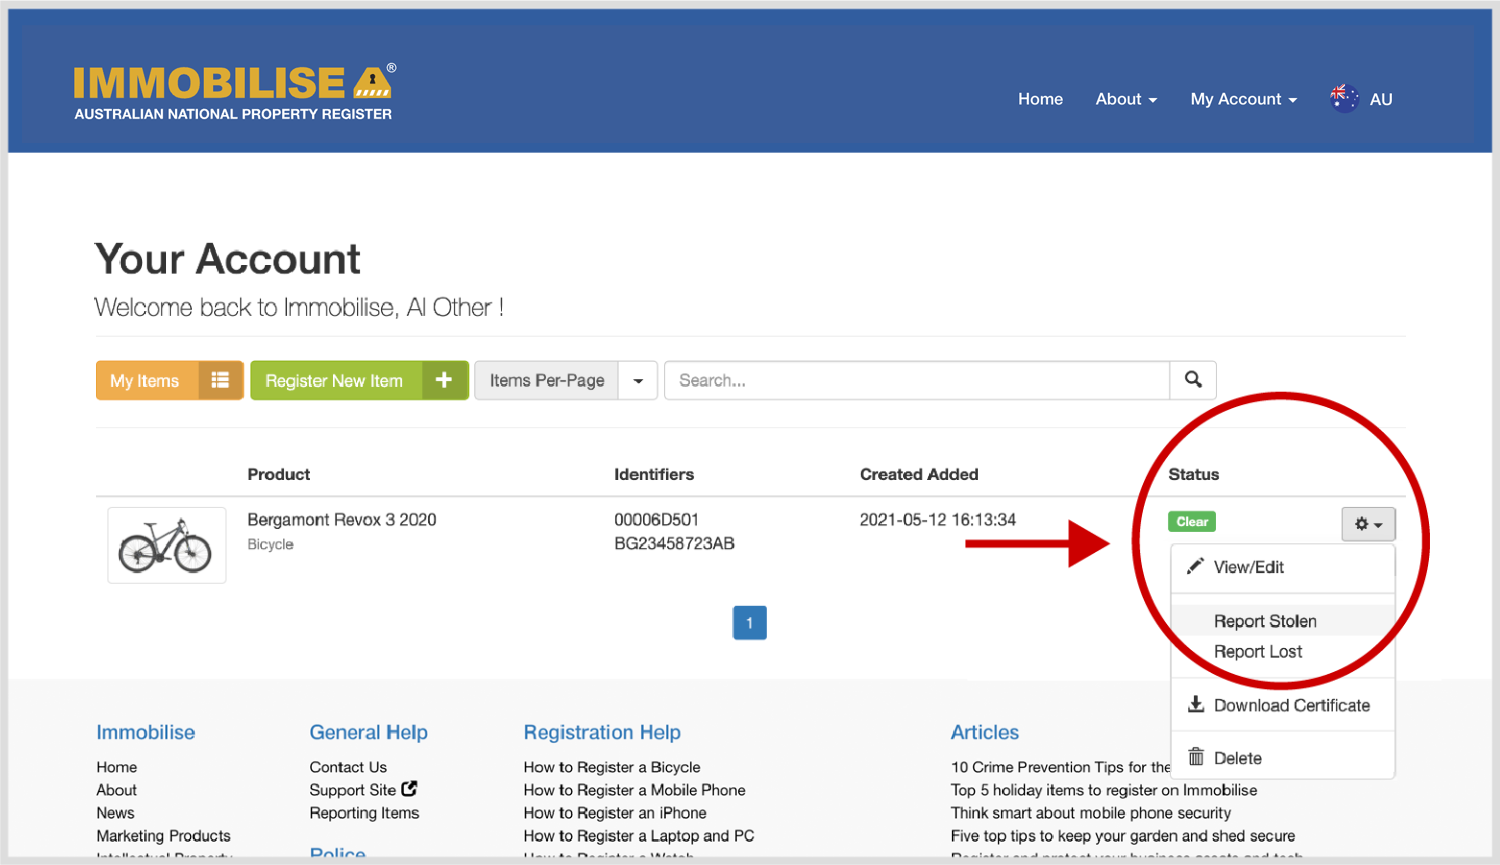
Clicking the My Items button will take you to your main account view and you will see your new and other registered items.
If you need to make a change, click the grey cog button to View/Edit item detail, Report Lost, Report Stolen, Download Certificate, or Delete the item.